Getting Started
Welcome to Lurna! This guide walks you through the basics so you can start taking notes, generating study sets, and mastering your classes in minutes.
1. What is Lurna?
Lurna is an AI-powered note-taking platform designed to help students transform their notes into meaningful learning tools. Instead of staying buried in text, your notes become:
- Flashcards for quick review
- Quizzes to test your knowledge
- Summaries that highlight key concepts
- Organized study sets for efficient learning
What makes Lurna different?
- Built specifically for students
- AI trained to understand academic structure
- Create once -> generate endless study material
- Designed for fast review and exam prep
- Clean, distraction-free workspace
In other words:
You focus on learning. Lurna handles the rest.
2. Creating Your First Course
A course is where all your notes live inside Lurna — similar to a digital binder for your class.
Follow these steps to create your first course:
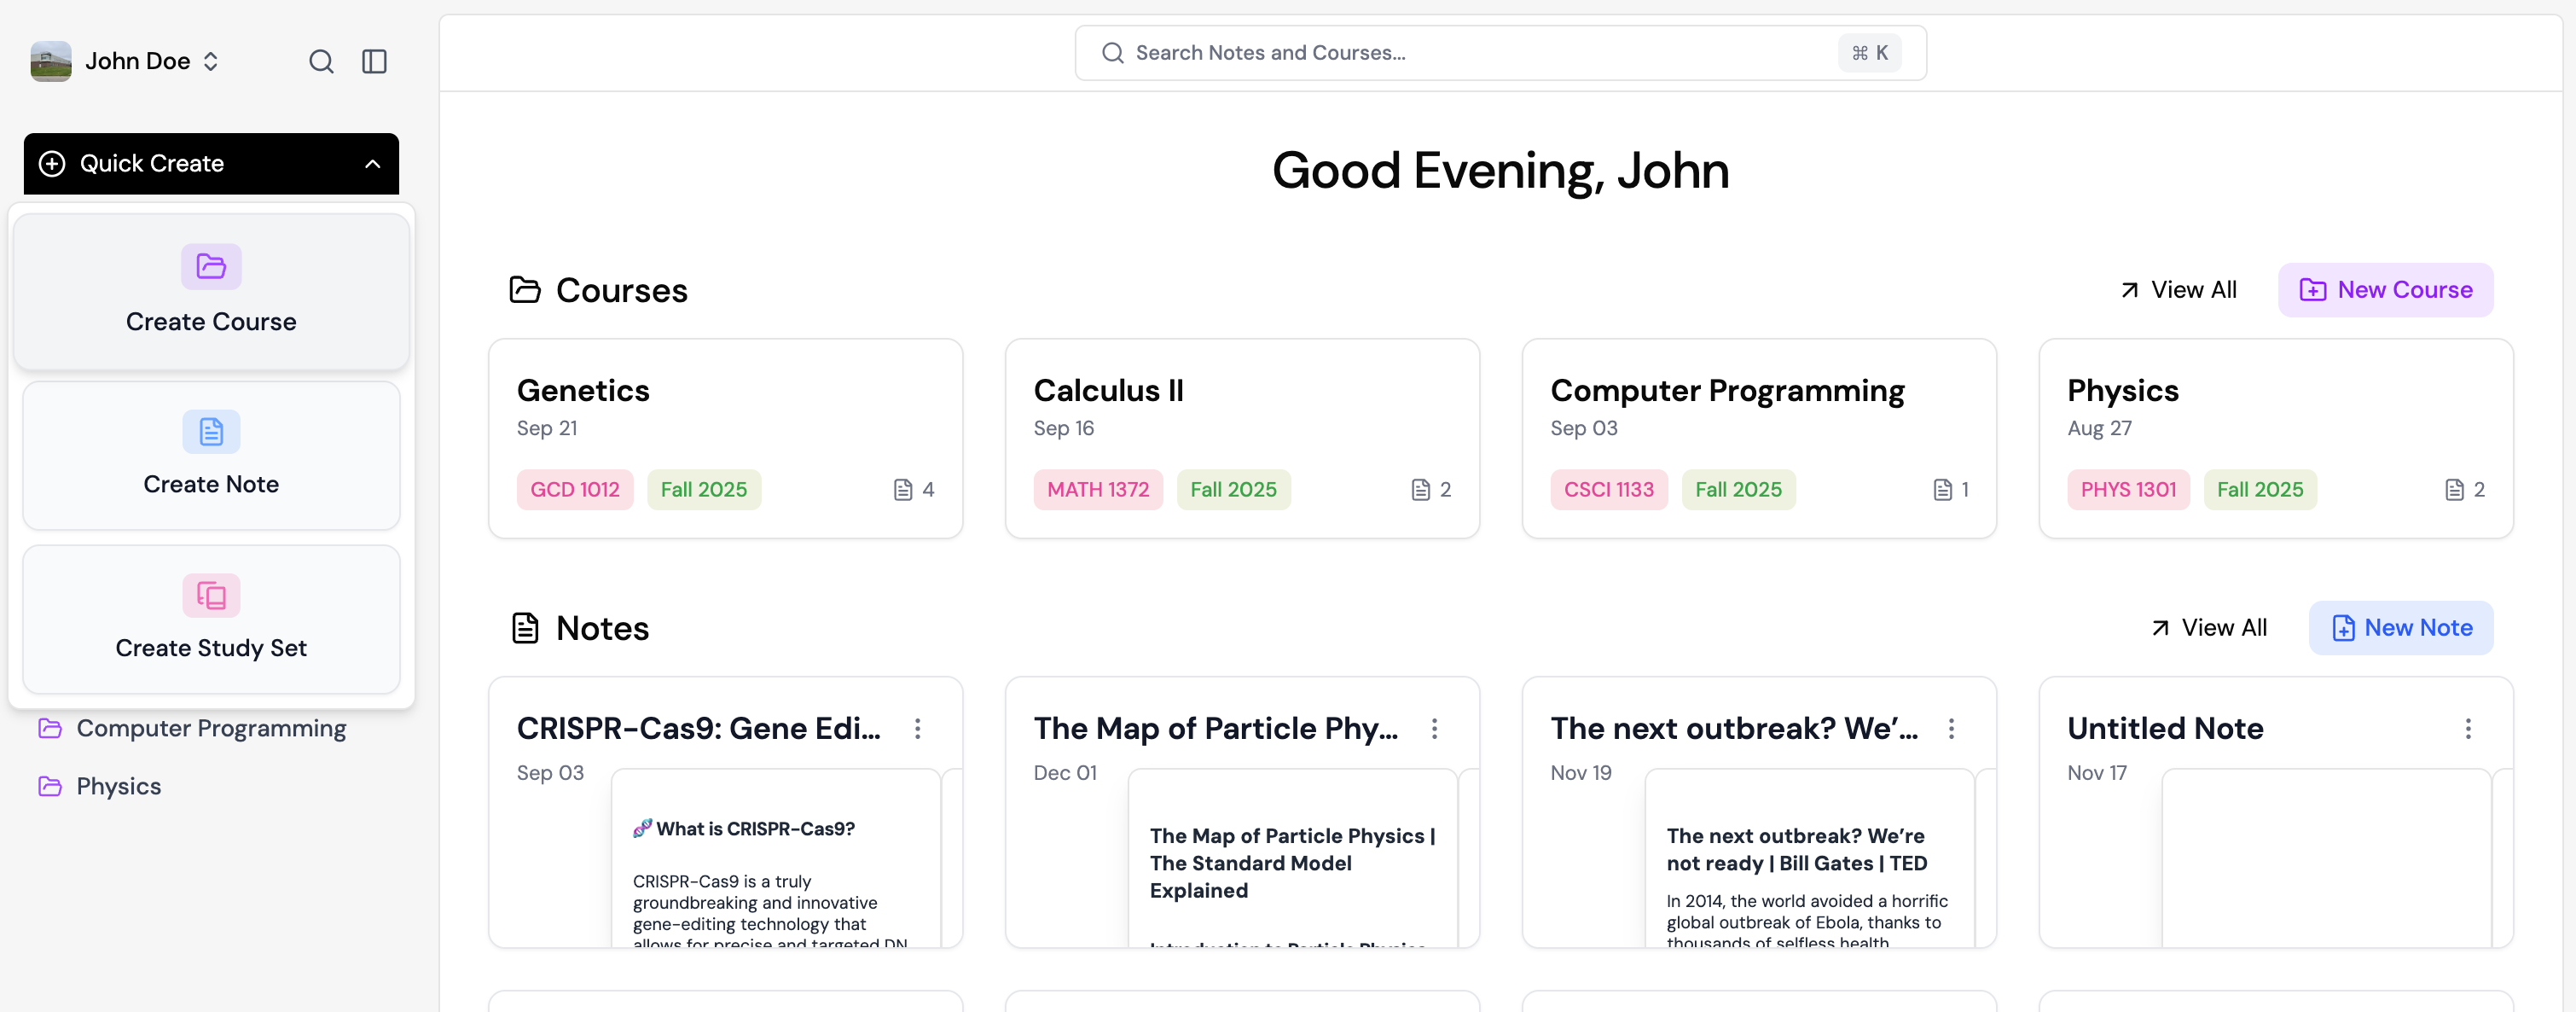
- Go to your Lurna dashboard after signing in.
- Click the quick create button and then click the Create Course button in the dropdown.
- Give your course a name (e.g., Intro to Biology, Computer Science).
- Optionally give it a course code (e.g., BIO101, CS50), professor name, year, or additional details.
- Then create a note under that course and start typing away!
3. Importing Notes or Documents
If your notes already live in another platform or file, Lurna lets you import them instantly.
Supported imports include:
- Markdown
- HTML
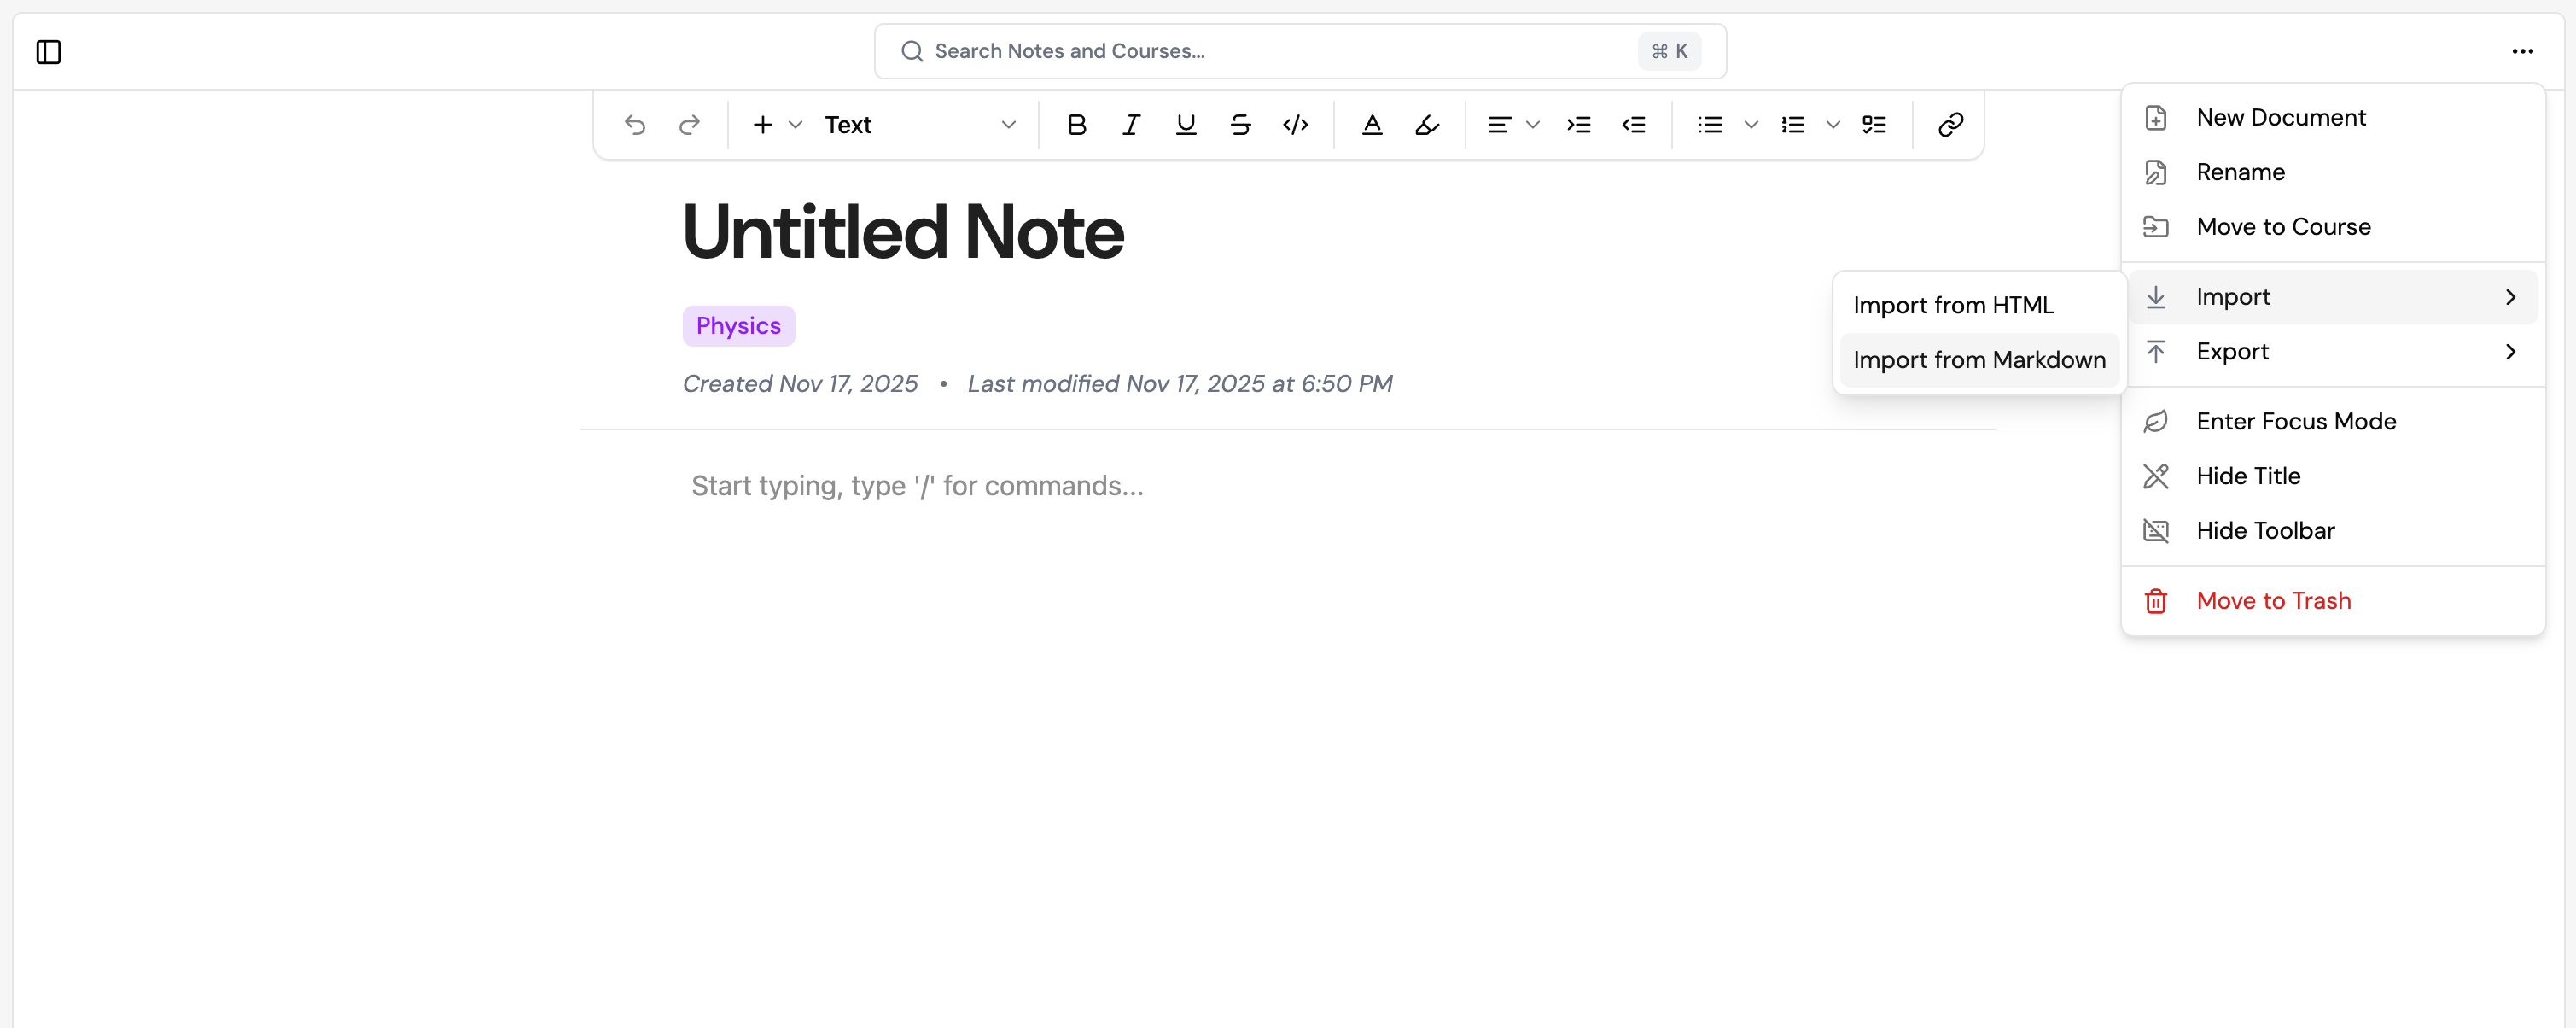
How to import:
- Open or create a note.
- Click the "Import" button from the more menu (three dots in the top right).
- Select the file you want to bring in.
- Lurna extracts the content and inserts it into your notebook.
- Review the imported text and clean it up if needed.
4. Understanding the Lurna Workspace
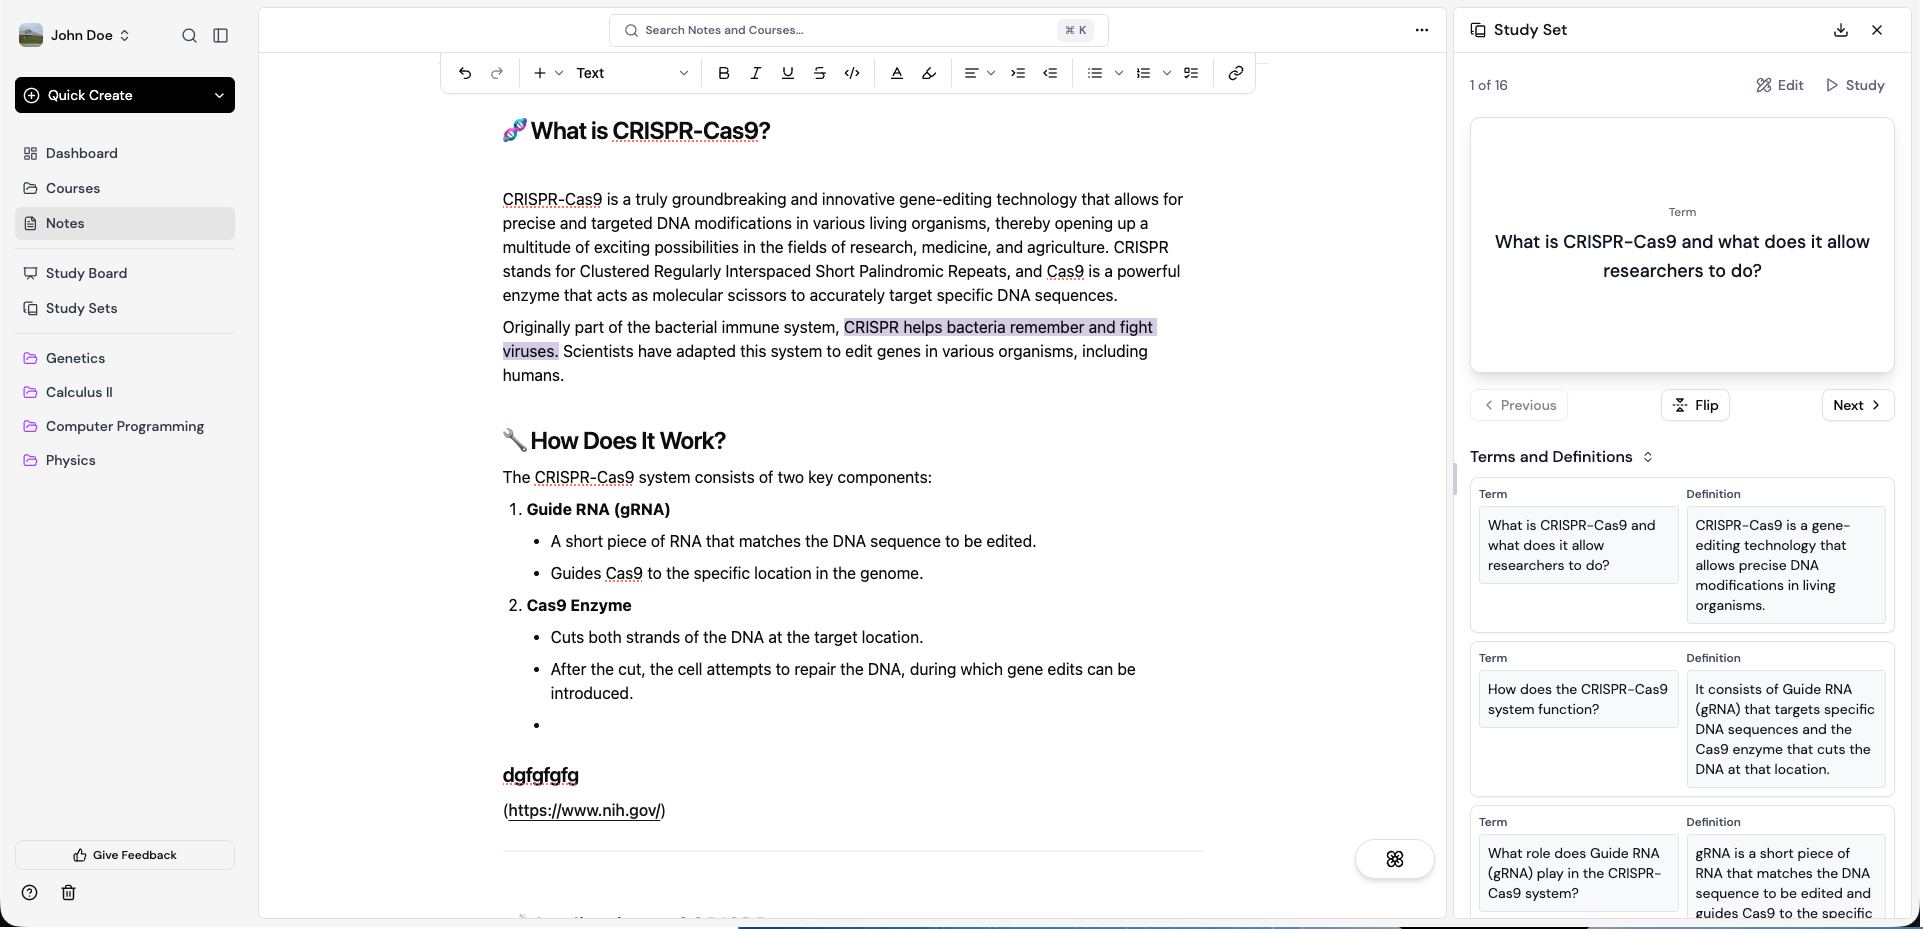
Lurna’s workspace is built to be simple, clean, and distraction-free, helping you focus entirely on learning.
The workspace includes:
- Editor (Center Panel): Where you type and edit notes. Supports headings, lists, images, code blocks, and more.
- Left Sidebar: Shows your courses and quick navigation throughout the entire app.
- AI Tools Panel (Right Sidebar): Shows AI-powered features like flashcard generation, summaries, and chatbot.
- Top Toolbar: Includes search, export options, and other note settings.